The steps below explain how to setup your Realty Pixel account. Follow these steps after your first Realty Pixel tour has been published.
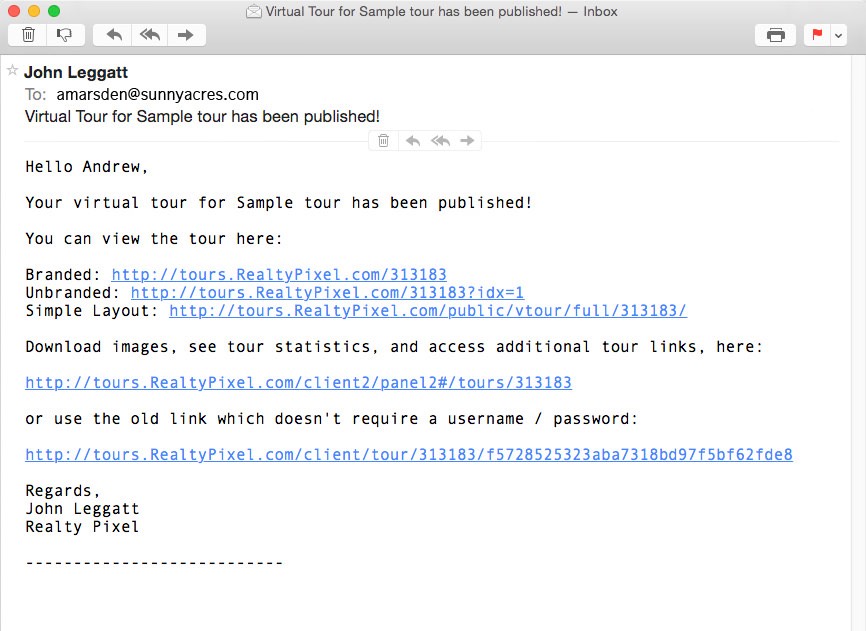
1. You will receive an email similar to the message above when your first Reatly Pixel virtual tour has been published and is available for viewing online.
Links in the message will take you to various versions of your tour. Please check your spam folder if you do not receive this or other messages from Realty Pixel.
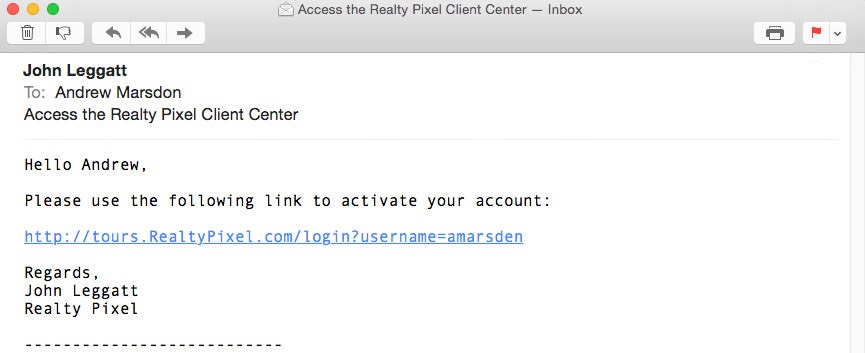
2. You will also receive an email like the message above. Click on the link provided in your email; the link will take you to a simple setup page for your account.
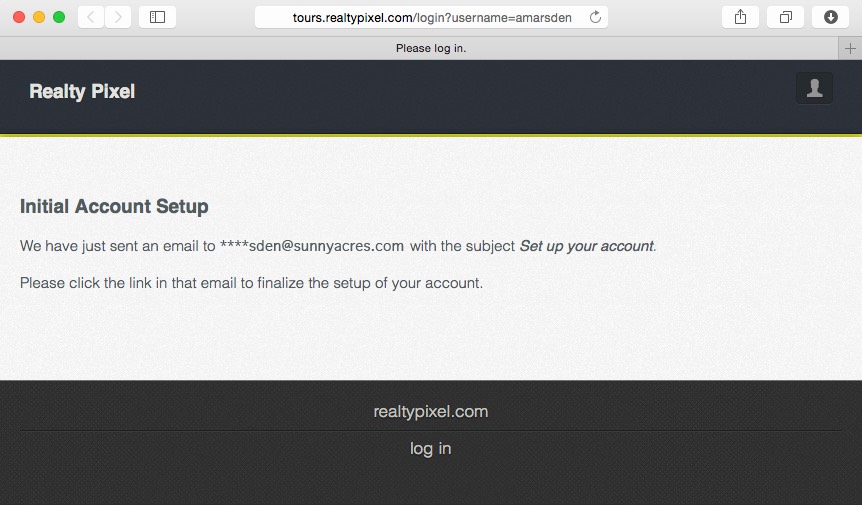
3. After activating your account as described in step 2 above, you will receive a message similar to the email above.
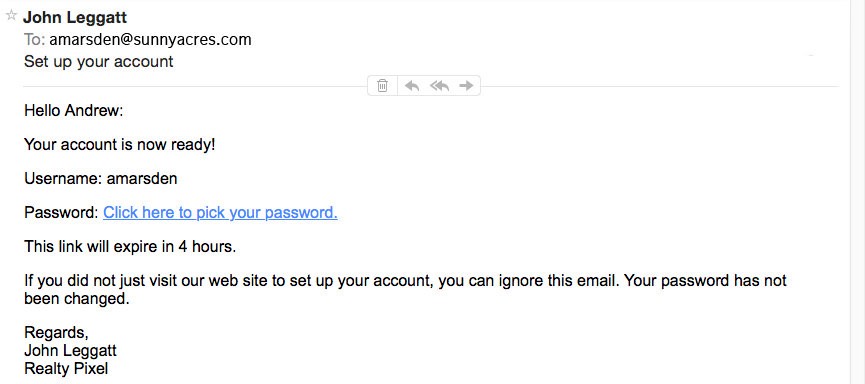
4. Time is of the essence in clicking on the provided link in the “Set up your account” message. The link expires in four hours after being sent.
If the link times-out before you can use it, call us or email a note to us with a request to send a new link. We’ll send you another link ASAP!
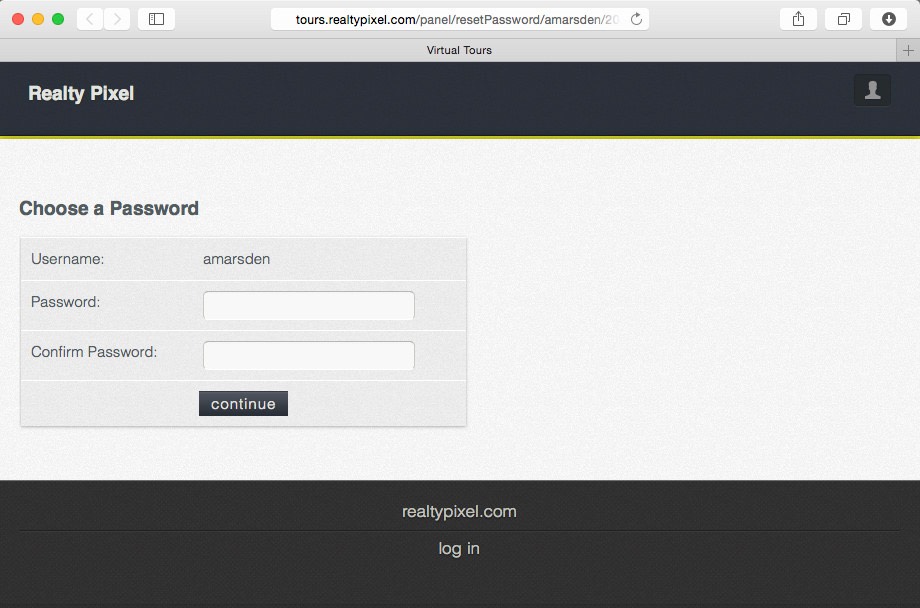
5. Enter a password for your new account. If you later forget your password you can easily reset it with a new one.
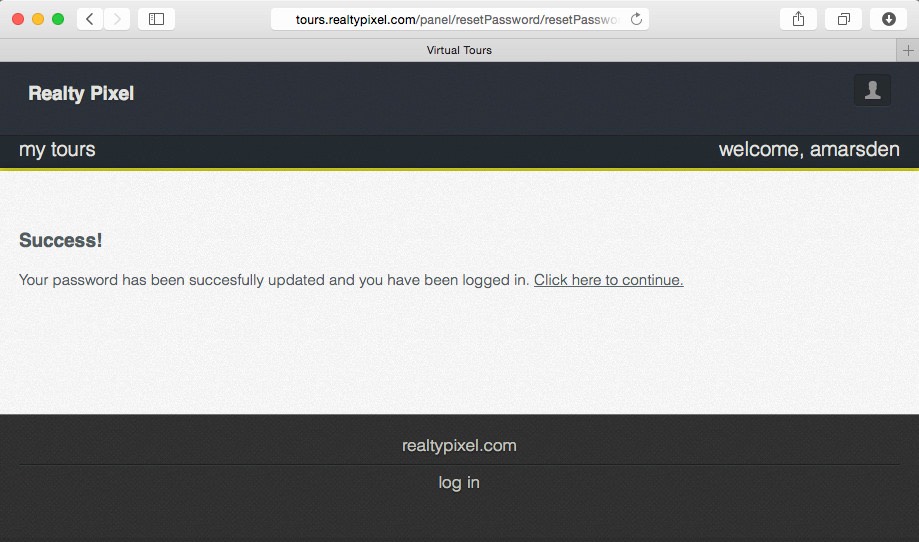
6. Click on the link to access your new account. Welcome!
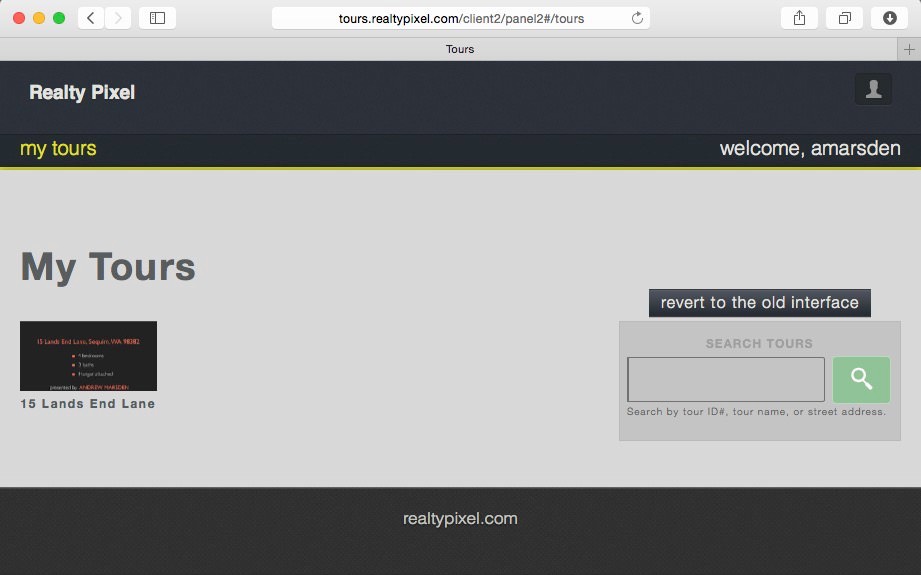
7. After logging in, this is the first page you see. All your tours are organized on your “my tours” page. Your tours are searchable by ID#, tour name, or street address.
Once you’ve setup your account, see “manage your account” to access the tools included with your tour.